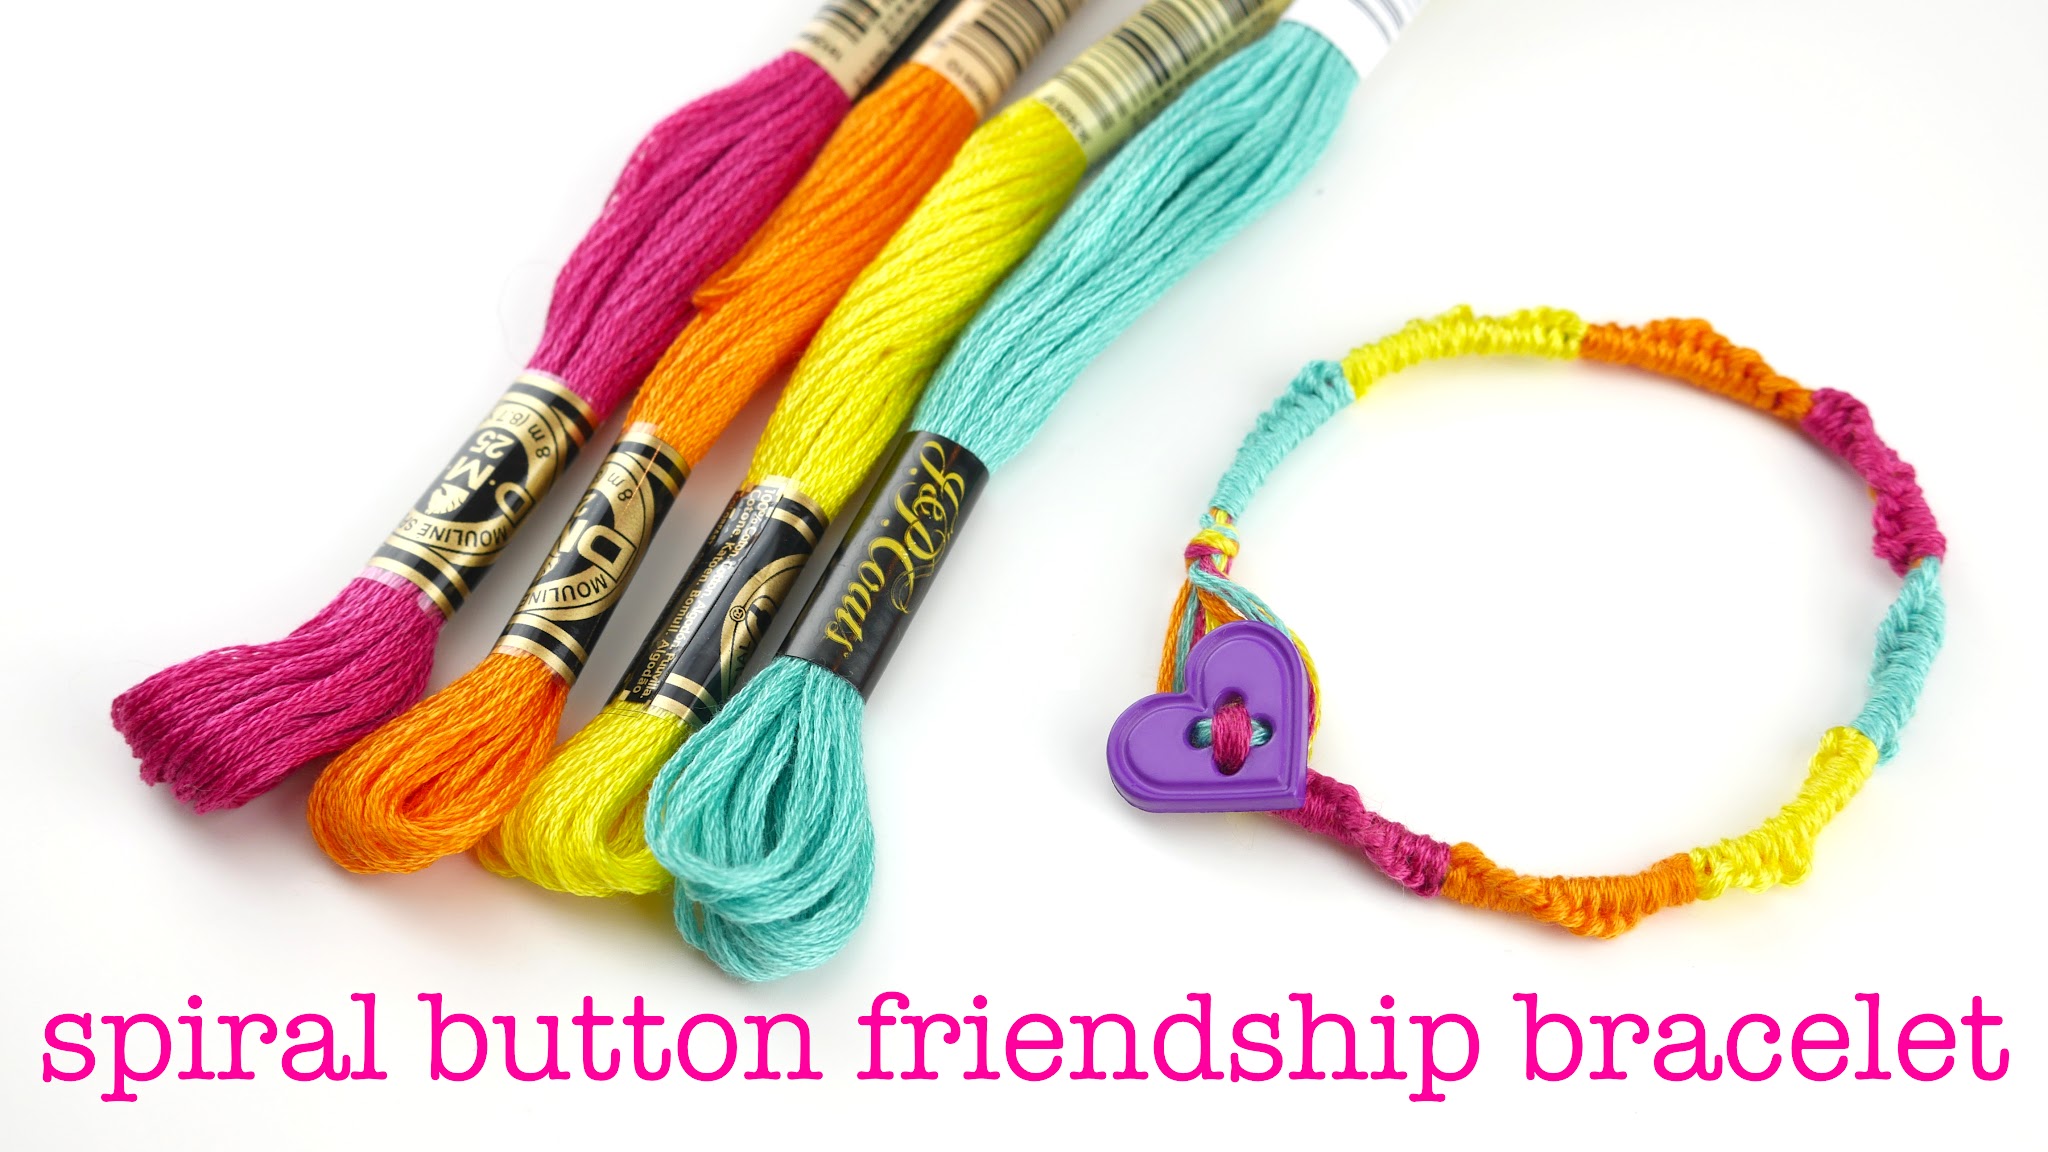
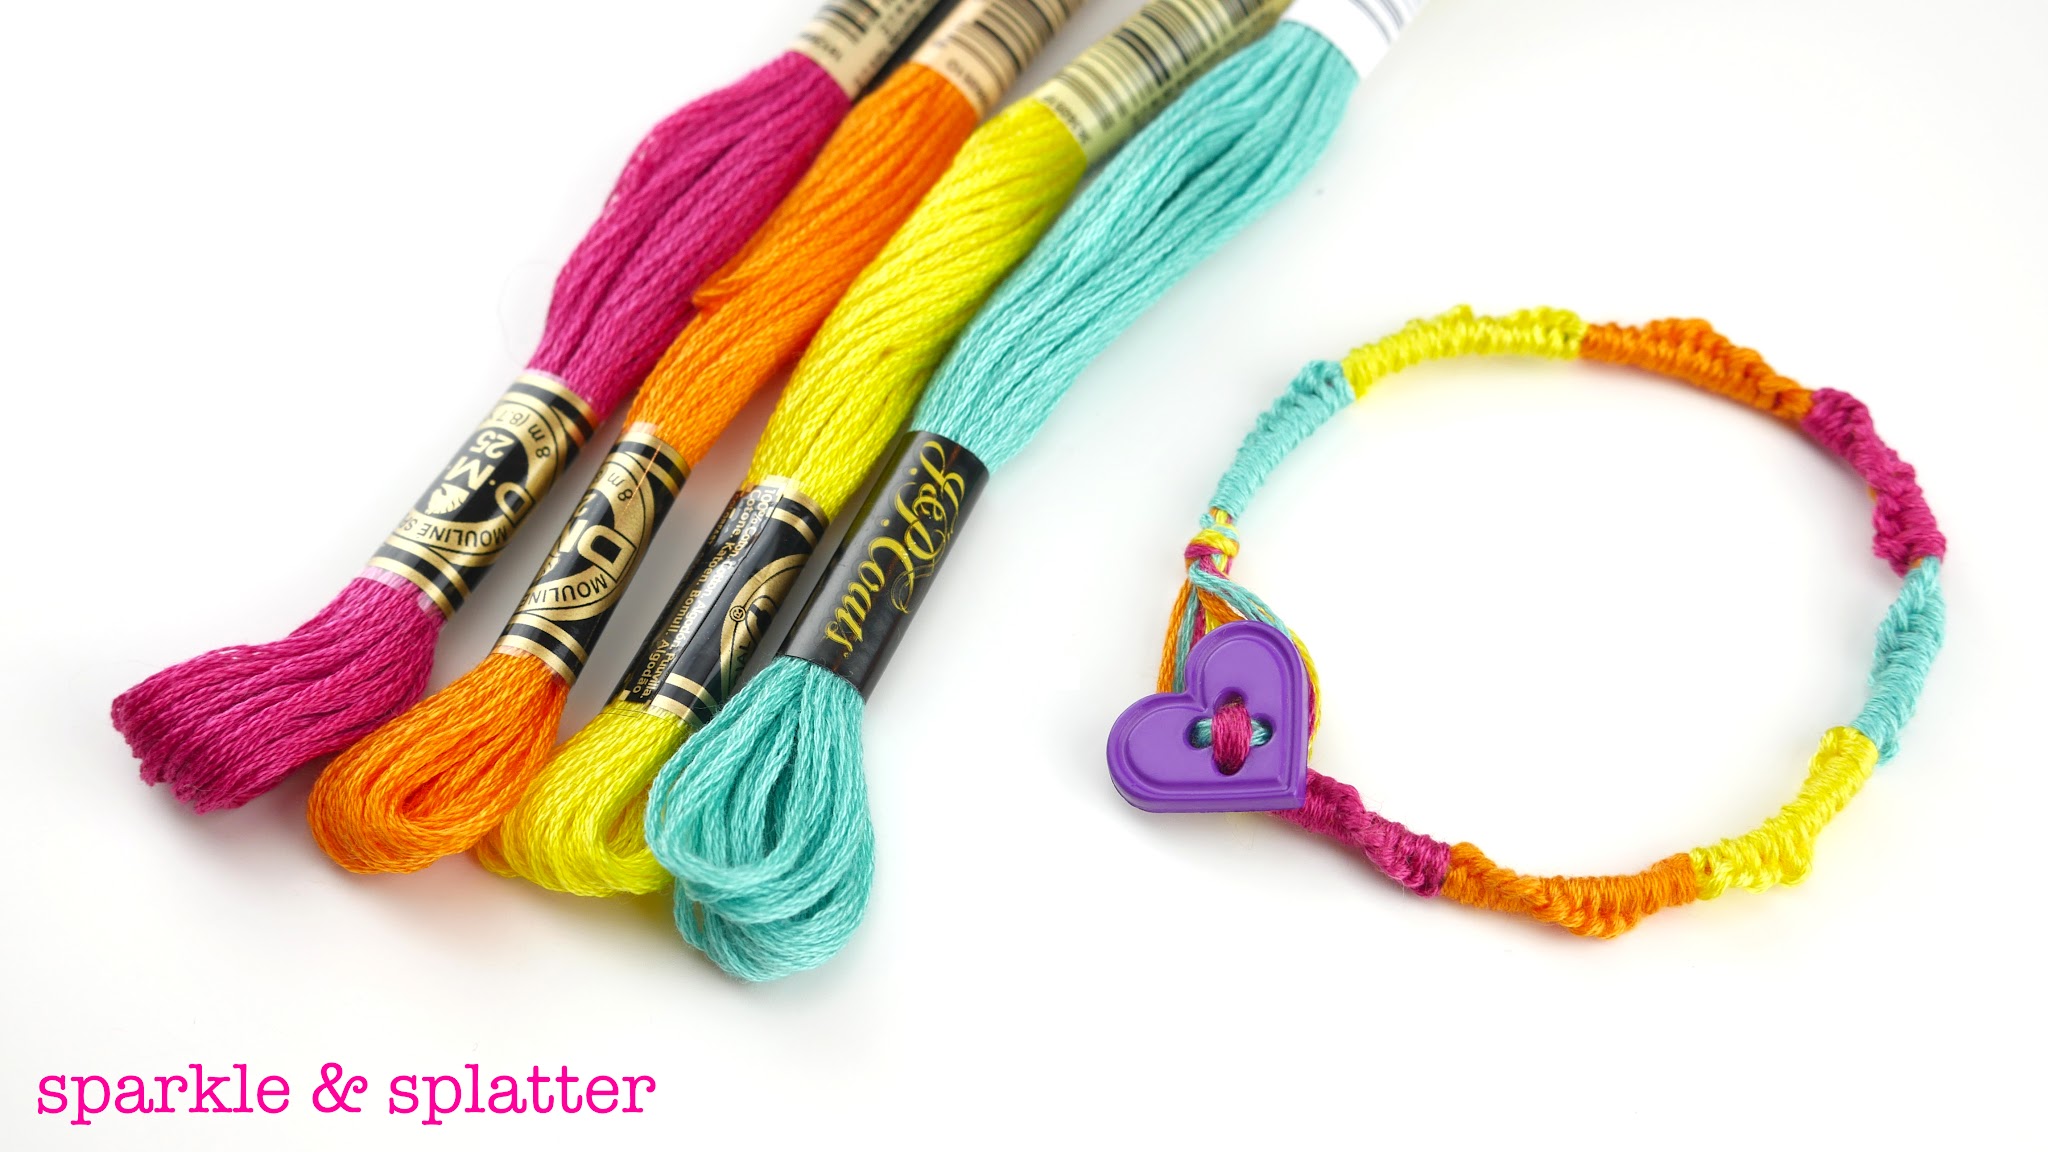
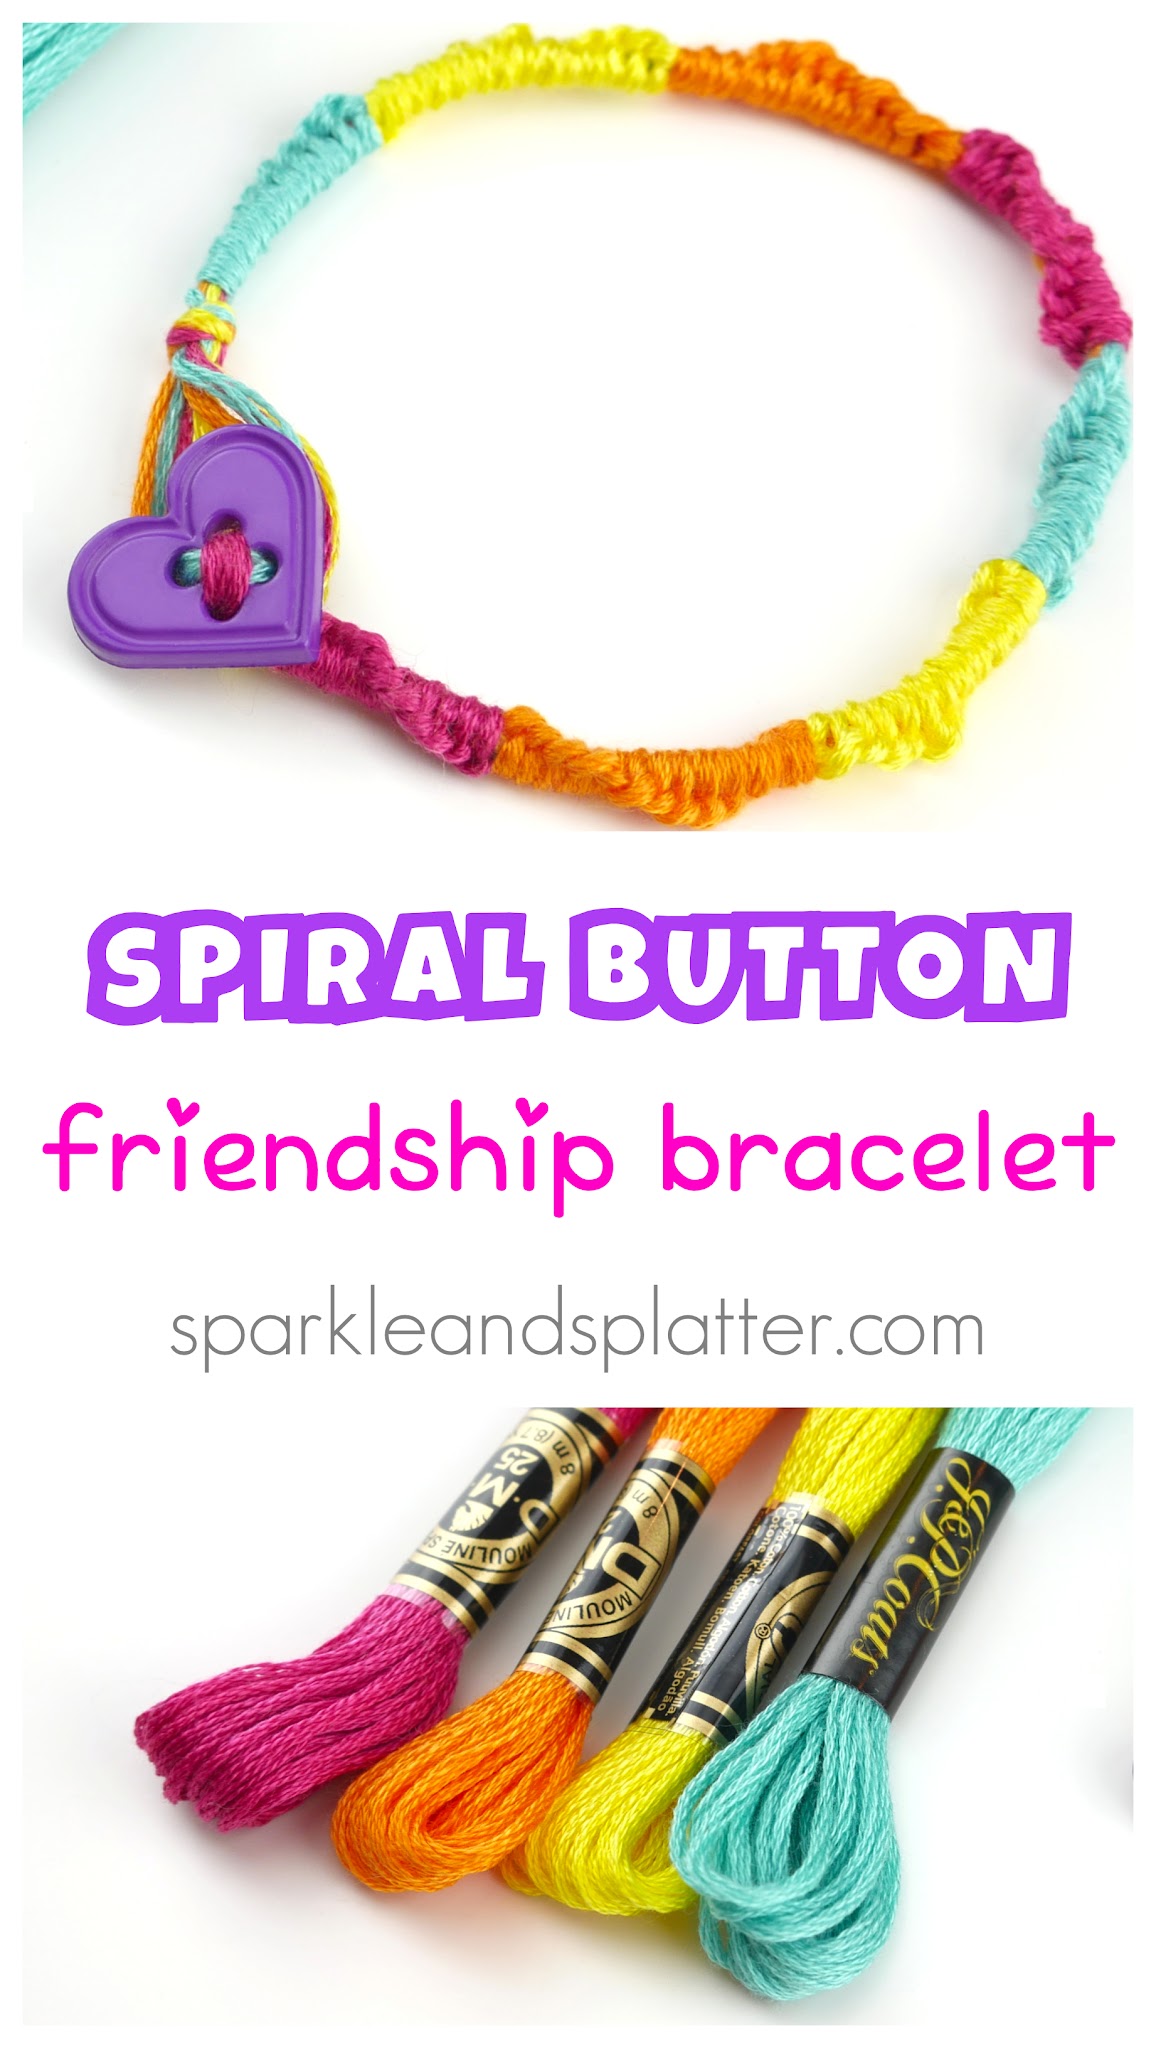
Make a super cute friendship bracelet with a button closure! Fun for you and make for a friend too!
Follow along to the full video tutorial too:
(Can’t see the video? Click here!)
Love fun craft videos? Be sure to subscribe to the Sparkle & Splatter channel for all of the latest crafty fun!
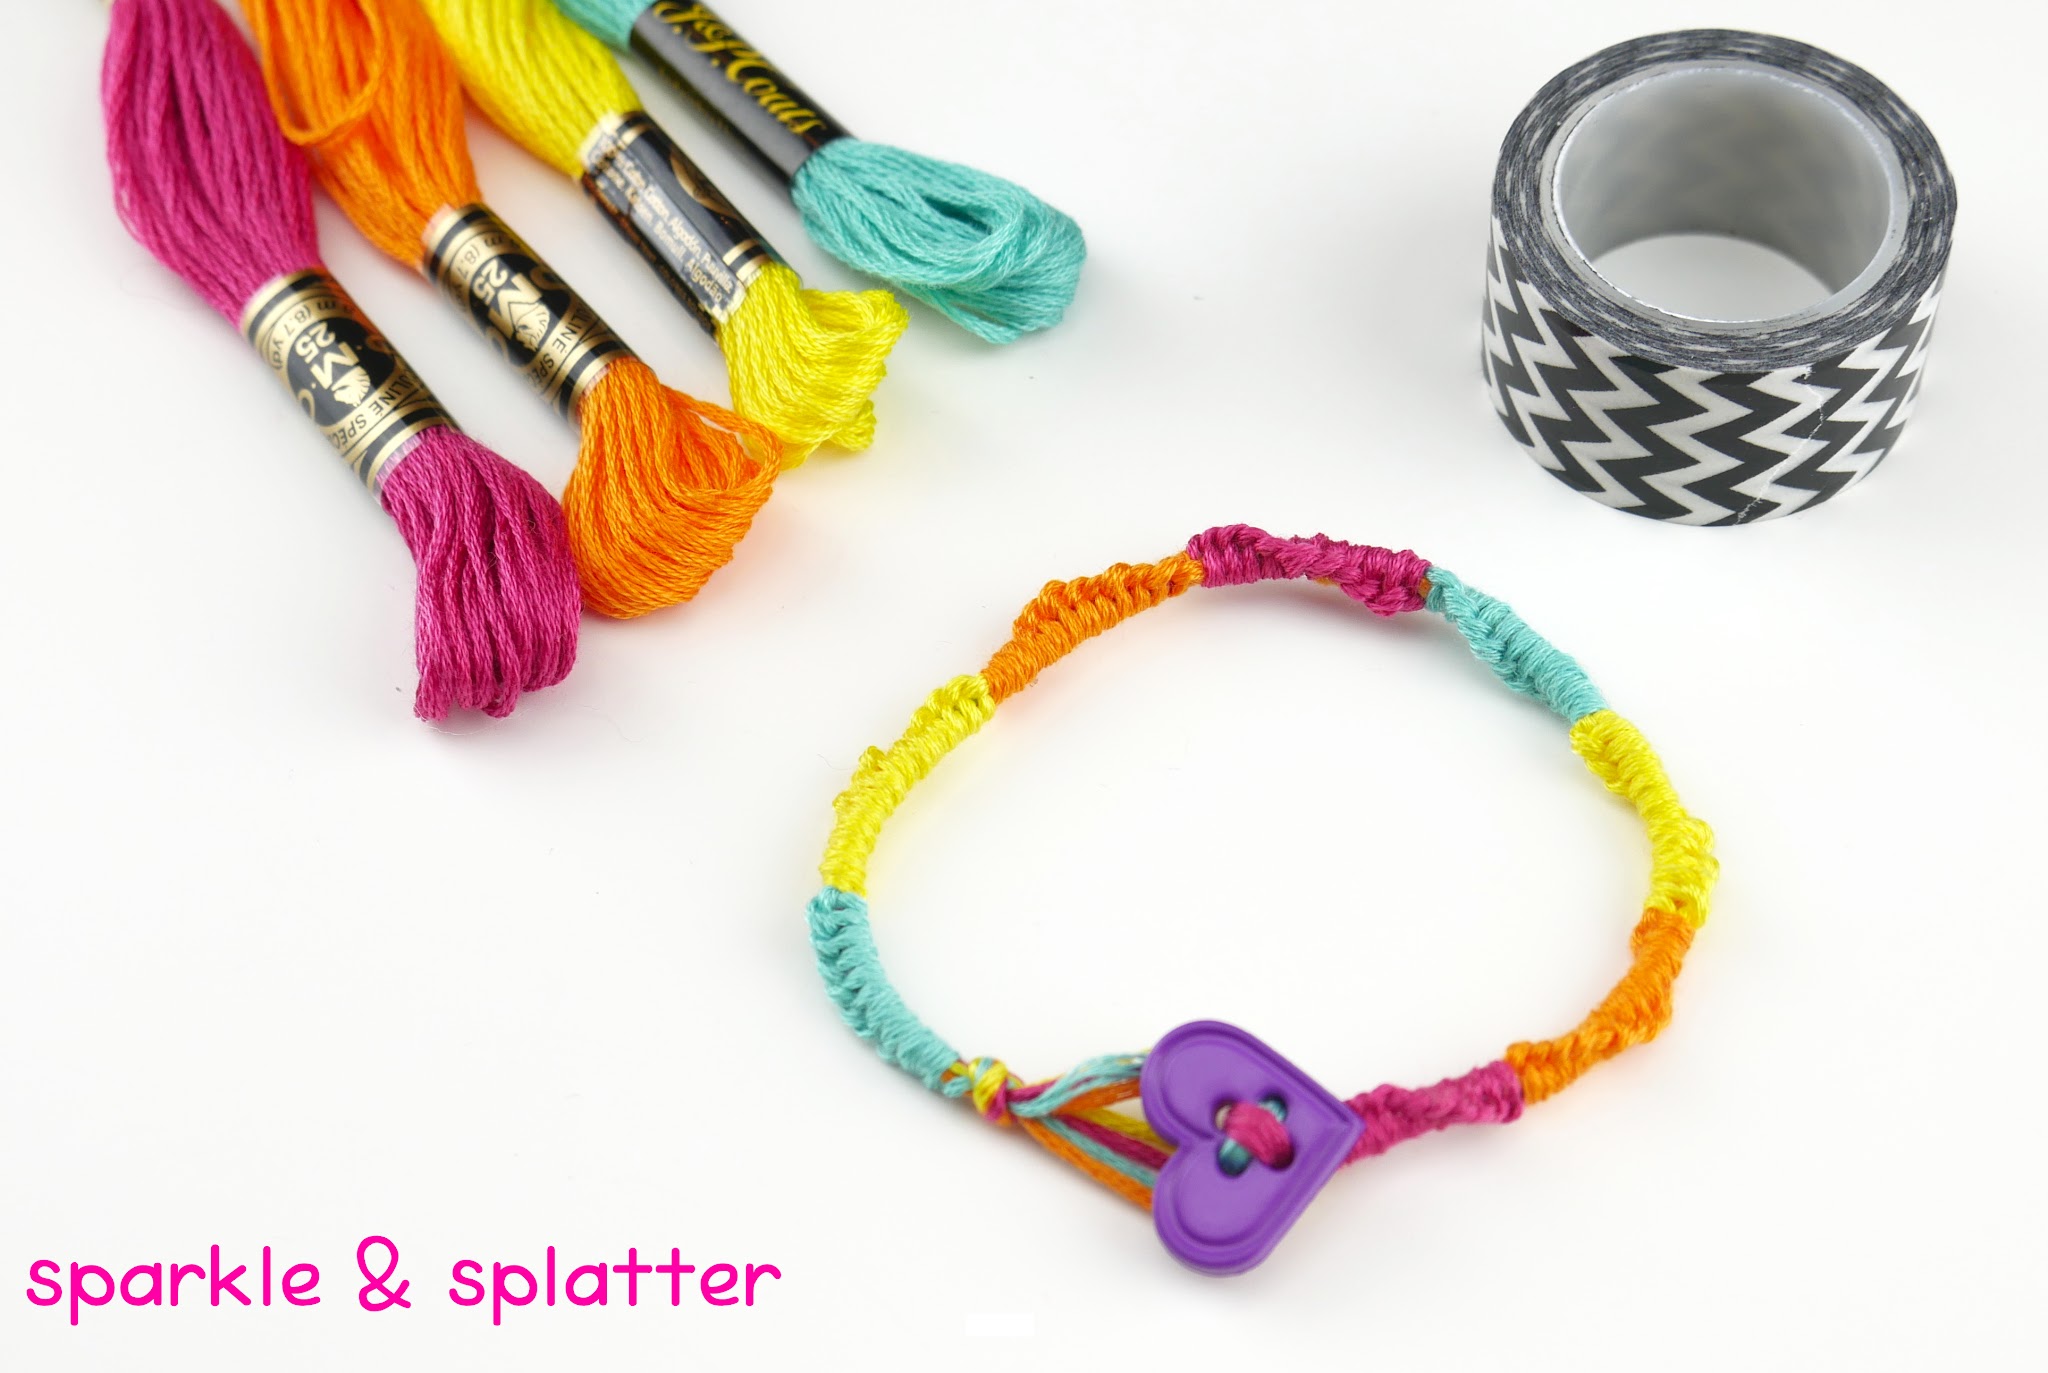
Here’s what you’ll need:
- Embroidery floss in colors of your choice
- Tape or clip to secure floss as you work
- Scissors
- Small needle
- Button
Here’s how to make it!
- Cut embroidery floss to about 2-3 feet long (all strands).
- Fold in half to make a loop at the top. Tie a knot towards the top near the loop, allowing a finger to fit into the loop. Tape down (or loop it onto something) right above the knot.
- Grab all strands of one of the colors and swing it off to the right. Keep the rest of the colors straight down. With the floss to the right, make a sort of backwards number four shape. Tuck the ends up under the loop you’ve created and snug it up to tighten.
- When you’re ready to switch colors, let the previous color hang straight now. Grab the new color and repeat. Switch colors as often as you like, more often for narrower stripes, less often for thicker stripes.
- Continue for as long as you need your bracelet to be, you might want to wrap it around your wrist to get an idea before you finish.
- When it is as long as you want, tie a secure knot on the bottom, then tie two ends together.
- Using a small needle, thread the button onto the bracelet using the tails at the bottom of the knot. Tie securely.
- Trim all floss tail ends and it is ready to wear!
For more family fun, be sure to follow Sparkle & Splatter for the latest projects and activities!